
For a while now, I’ve admired those cute, pin-free notice
boards made with fabric and ribbon. When I gave my bedroom a mini-makeover, I
got rid of my cork notice board (which I was previously using for necklaces) in
favour of a home-made necklace board!
However, I’ve had an increasing need for somewhere to stick
important notes, so sat down to make a notice board using things from my stash.
 |
| Sherlock Holmes Museum card and train tickets = utmost importance! ;) |

Alright, so I broke my resolution (again) and bought a frame for this project.
But it was £1.50 from a charity shop, so that doesn’t really
count, does it?
...maybe it does, but at least the money went to a good
cause!
This notice board turned out to be fairly simple to put
together, and took about an hour to complete. Here’s a tutorial, with lots of
pictures!

You’ll need:
Picture frame
Batting/similar for padding*
Fabric
Ribbon
Buttons
Needle & thread
Duck tape
Scissors
Glue
Tape measure
Pen
* I used a bit of filling from an old pillow that was due to
be thrown out :)

1. Remove the back of the frame and set aside. Take out the
glass (you won't need it for this--either recycle or reuse!)
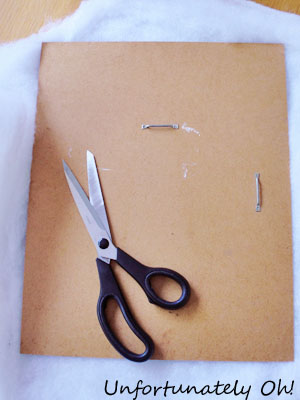
2. Lay the back of the frame on top of your chosen padding
and cut around the edges.

3. Spread glue across the inside of the back (the side that faces into the frame) and stick
on the padding.

4. Cut a piece of fabric approx 4 inches wider and longer
than the frame back (to give a 2 inch border all around)
5. Lay the fabric face down on your work surface, and lay the frame back in the centre, padding side down.

6. Cut a length of tape and stick along one of the long edges of the fabric, sticky side up. Carefully fold over onto the frame back, smoothing as you go to ensure there are no creases in the fabric.
Repeat for the opposite side, pulling the fabric tight across the front.

7. Repeat step 6 for the shorter sides of the frame. To get
neat corners, fold the fabric as you would fold paper when wrapping presents!

8. Measure the length and width of the frame back and work
out a ‘common factor’--a number that both measurements are divisible by!
Make dots on the outside of the frame back (side facing
outwards) spaced apart at the distance you calculated
Example:
My frame is 15 inches x 12 inches. Both numbers can be divided by 3.
I drew dots spaced 3 inches apart along each side.


9. Use the dots as a guide for where to stick on your
ribbon. Attach the first piece of ribbon using tape, at the desired angle.

10. Attach further pieces of ribbon to run parallel with the
first piece.
The spacing will depend on the size of your frame back and
how far spaced you want your ribbons to be, but here is how I attached mine:
From the top dot on the left edge to the bottom dot on the
right edge
From the third dot on the left edge to the third dot along
the bottom edge
From the first dot on the top edge to the second dot on the right
edge

11. Stick on the rest of the ribbon, running in the opposite
direction.
My spacing in this case was the reverse of how I explained
in step 10:
Top dot on the right edge to the bottom dot on the left edge
Third dot on the right edge to the first dot on the bottom
edge
Third dot on the top edge to the second dot on the left edge
(The only dots that I didn’t attach ribbon to are the centre
dots along the top and bottom edge.)
Alternative to steps 8-11: Eyeball it. ;D

12. Sew on your buttons!

13. To finish, slip
the covered frame back into the frame and fix in.
You can see here what
a mess the back looks...oh well, nobody will see it when it’s against the wall! I gave it an extra layer of tape all the way around after adding some of the ribbons.

I hope this tutorial is clear enough and doesn’t sound too
complicated. Making this notice board was easy, but trying to explain how was
something else altogether!
Of course, exactly the same method can be used without using
a frame (just use an off-cut of wood instead)!
Will be linking up at the parties listed below! :D
oooooh I love this!! I think I love it more that the frame is only £1.50!! I can't wait to get to the charity shop to find a frame of my own to give this a try! Thanks so much for sharing :-)
ReplyDeleteResolutions are meant to be broken especially when then turned out so good! I love frames and always on the lookout for more. Thanks for sharing your creative inspiration with Sunday’s Best – you helped make the party a success!
ReplyDelete