Wednesday 22 February 2012

Tag!

So Terry from These Pease Taste Funny has tagged me in an 11-question game! I thought I'd give it a whirl, since these things are usually fun!

Here are the rules, dutifully copied and pasted from her blog :)

RULES
**You must post the rules.
** Answer the 11 questions that the tagger posted for you & then create 11 questions to ask the people you've tagged.
** Tag 11 people and link them in your post.
**Let them know you have tagged them.

 And here are Terry's questions, along with my answers!


1.  How did you decide to start blogging?
I started this blog as a replacement for a LiveJournal, which I began as a way of sharing my creations online, along with tutorials. People used to ask me how I made things, and eventually I realised it was easier to make proper tutorials and post them somewhere, rather than just try and explain the process with badly-drawn pictures!


2.  What would be your dream job?
I am still stuck on this question. I've wanted to be an astronaut, a special effects makeup artist, an artist, a writer, a photographer, and a plathora of other things! I still haven't decided but right now I suppose having my own shop of random things would be fun!


3.  What is your favourite movie or book?
Favourite movie is probably Labyrinth because I'm a geek for fantasy, or Pan's Labyrinth for the same reason. However, I have a special place in my heart for bara no konrei (aka Bridal of Rose), a silent vampire film made by a Japanese band that I love! It takes the storyline of half a dozen other vampire films and the acting is pretty terrible, but I love it nonetheless.
The soundtracks to all three films are awesome, too!
Book-wise, my favourite is Poppy Z. Brite's Lost Souls. It's gained me friends and fun and I've read it countless times!

4.  Favourite food?
Predictably, chocolate. Though I do absolutely love noodles as well!

5.  If you had an entire afternoon free, who would you want to spend it with and doing what?
Ooh tough question! If I could spend it with anyone in the world, language barrier be damned, I'd want to spend that free afternoon with Shina, (vocalist of the bands dangan shoujo and NOISY CROWDS) at Nekobukuro, playing with all the cats!

6.  What is the most significant goal you have achieved to date?
Going to a concert of two artists I never thought I'd see, in London, alone. 
...I did that yesterday, and it was fantastic.

7.  What is your dream vacation?
A world cruise!

8.  When you go to weddings, do you dance or sit like a bump?
I sit like a bump and watch the drunk people dance :) 
 I also take pictures of random stuff, like bits of confetti on the floor.
(I went to a wedding last Wednesday!)

9.  If you were going to volunteer for an organization, what would it be?
I am a volunteer already! I volunteer in the shop of a charity that helps underpriveledged people in Romania.
Mainly because I was looking for somewhere to volunteer, and they were looking for volunteers! They do some great work though!

10.  Favourite celebrity or sports star?
I don't really have a favourite...

11.  What is your best go-to recipe when you have company coming?
Since I live with my parents, I don't tend to have company. If I did, I'd probably whip up a sweet and sour chicken stir fry with noodles, because it's so quick to pull together!

Mm, some of those questions were pretty difficult to answer! But as Terry wrote, that is the relatively easy part!

Here are my questions for you guys:
  1. Do you prefer to roll with the crowd or do your own thing?
  2. What music/film/book to you like that surprises people?
  3. What thing do you do that makes you most happy?
  4. If you could ask anyone, living or dead, just one question, who would it be and what would you ask them?
  5. How do you reward yourself?
  6. What thing can you absolutely not give up?
  7. What is your favourite sound?
  8. Do you have any collections? If so, what do you collect?
  9. What is the first thing you do upon returning home?
  10. What would you consider your strong point?
  11. If you could only do one kind of craft for the rest of your life, what would it be?
Tagging:
...ok, I admit I find tagging people really hard! 
So what I want, is for you to do it.
If you fancy a few minutes of fun, I hope you'll join in!
I'd love to find out more about you

Saturday 18 February 2012

Cushiony Winnings!

A couple of weeks ago, I entered a giveaway being held by Samantha (At Home With Mrs H), for a pair of fabulous cushions. Now, I don't enter giveaways too often, but this time I thought I'd try my luck--and I won! Hooray! :)

So a few days ago, this well-stuffed purple package turned up in the post...


Alfie gave his approval immediately ;) He usually runs away from any kind of plastic bag, so he must have felt the good vibes!


Inside the cool purple package were these even cooler cushions. 


I love the print! I like butterfly motifs anyway, but the overall design and colours of the fabric is so lovely! 


My sister is moving out soon - she and her boyfriend of several years have found a place of their own - and they have pretty much nothing for their new place. So I offered them to her, and she nabbed them!

So there goes the first giveaway I ever won...!
Winning that giveaway really made my day, especially since I've not been the happiest (or healthiest) of souls lately. Curse those winter blues! 
Thank you, random.org for picking me, and thank you Samantha for holding that fabulous giveaway! :) I love those cushions!

I totally recommend At Home With Mrs H to you guys! Head on over now and check out her most recent creation, a gorgeous patchwork bible cover :)

Thursday 16 February 2012

Embroidered Tags

Yesterday I posted about the gorgeous vintage suitcases I now use to store my fabrics. I mentioned that I can’t see through the sides like I could with the plastic boxes I used to keep the fabrics in. Well, here is my solution!


These embroidered tags were made using things from my scraps box :)


I was inspired by these Anthro knockoff Penmanship gift tags, made by Bev at Flamingo Toes:


(I pinned this ages ago, intending to use the idea at Christmas…then was too crafted-out!)

As you can see, mine deviated quite drastically from Bev’s!

Keep reading for the tutorial! :)


Wednesday 15 February 2012

Vintage Suitcases...part two! Plus a little retro.

After posting about the vintage suitcases that I brought down from the attic, I got completely distracted from posting any more about them!

I wrote previously that the cases smelt musty, and that I didn't want that smell to get onto the fabrics I planned to put inside.
To combat the smell, I spread baking powder inside the bottom of each case. Problem was, Alfie decided he liked the taste of it...

He wasn't very happy that I shut him out of my room after this!

After leaving the baking powder in the cases for a few days, I vaccuumed it out (along with tiny fragments of paint/wood/paper from the previous contents of the cases!) 
There was a hole in the lining of one case:


I decided to snip off the rough edges, then found that the fabric had come unstuck from the base, so snipped that off...and snipped...until suddenly it looked like this...


Argh!

Of course, I couldn't put my fabrics straight onto that, and I'm too lazy to reline cases at the moment. Drawer liners to the rescue!


I popped some in all the cases to keep them smelling nice. The baking powder had taken the musty smell away, but nice smelling fabrics are more enjoyable to work with! 

In the case with the damaged lining, I also stuck in a little lavender sachet I made before Christmas, to give a little extra scented goodness!:

After all of that, the cases were ready for my fabric stash!

Originally my fabrics were stored in plastic boxes...


Large, easy to see into, quick to get at.
Except the lids of both boxes were broken (my fault for cramming so much in) and the full boxes getting heavier to pull from beneath the bed. 

Also, vintage suitcases look way cooler. 


I separated my fabrics into black & white, red & grey, gold & misc (with linings and interfacing). I have so much black fabric it's bordering on ridiculous. But I guess I'm all set for Halloween?!

These cases went nicely under my bed! 
Within my room I also have these retro lovelies:


The round black vanity case came from the charity shop. I got it cheap because it had some paint splashes on, most of which cleaned off. 
The green cases came from the loft - Dad was going to throw them away because the catches are rusty and the larger one has a little damage! I said 'Noooooo!' and spirited them up to my room, out of harm's way ;) 

As for what's inside...


More fabrics! This is my 'scraps box'!

In the vanity cases...


Fascinators! Mini hats! Mini crowns! Random other things! 
At one point I had a small obsession with making mini hats and mini crowns :)  One one of the mini hats in the picture wasn't made by me (it was made by Primark!)


After all the palaver with baking powder, I now have fabrics in nifty vintage cases. 

True, I can't see inside them now, as I could with the plastic boxes. 

But I have a solution! Come back tomorrow to see what it is :)

Thursday 9 February 2012

Fake Fur Heart Cushion

Is everyone ready for Valentines Day?
I have another Valentines-worthy craft to share with you today! 


This furry heart cushion was put together in a morning, using leftover fabrics and trim.
I previously used the dark gold fabric for my jewellery display board and also on a skirt--talk about multi-functional! 

 
I chose the colours for my cushion to match my room, but this would look great with different colours and patterns, too!

Here’s an easy tutorial if you want to make your own heart cushion!


You’ll need:
Cushion pad
Fabric for cushion base
Fake fur for heart
Heart template
Trim (enough to go around the heart)
Glue (optional)
Thread to match your fabric(s)

Tools:
Sewing machine/needle and thread
Scissors
Pinking shears (optional)
Ruler
Measuring tape
Marking chalk or pencil


1. Measure your cushion pad and add seam allowance.
Cut two pieces of fabric:
  • 1 x your cushion measurement (e.g. 15”x15”) for the back.
  • 1 x your cushion measurement with half that added on one side (e.g. 15”x22.5”) for the back flap and front. It helps to draw out the original measurement and then add on the extra half-width as it gives you a line to work with in step 2!


2. Fold the back flap over onto the front of the fabric and crease. This will make it easier to attach the heart centrally to the front of the cushion.


3. Draw around your heart template onto the back of the fake fur and cut out.
            Tip: Use small snips of the scissors and cut only through the back of the fur to avoid having lots of loose fibres everywhere!


4. Attach the heart to the centre of the cushion. I took the lazy route and glued it, but hand-stitching is just as good. (The great thing with fake fur is that it doesn’t need hemming!)

If you pick the same option as me, leave the glue to dry before moving to the next step! Don’t get gluey fingers like I did!


5. Pin the trim around the edge of the heart and sew. To avoid sewing through the fake fur, brush the fibres back with your fingertips as you go.


6. Hem the end of the back flap and one edge of the back piece of fabric, for the opening. I didn’t hem the back piece on mine because I used the edge of the fabric, which had already been finished.


7. Right side facing up, fold the back flap down over the front of the cushion. Lay the back piece of fabric (hemmed edge at the top, overlapping the back flap) over the top.


8. Pin the bottom and sides, then sew. Since my fabric frays a lot, I used pinking shears to finish off the seams!


9. Turn the cushion cover the right way, using a pencil to turn the corners. You should have a neat little envelope opening at the back. Stuff in your cushion pad, and you’re done!


10. Enjoy alone, or with cushiony friends :)

Will be linking up to the fabulous parties at the bottom of the page!
Will also link up at this brand spanking new linky party for tutorials!
A Law Student's Journey

Dear Deer


I wanted to share this picture of two visitors we had in our close a few days ago! I had to zoom in quite a bit to take the photograph!
Knowing from experience that these lovely creatures tend to run off at the slightest movement, the moment I grabbed my camera I engaged ninjah mode!
Unfortunately I only managed to snap a few heavily zoomed in photos before something disturbed them and they ran off.
We do see deer every so often in our road, since the bottom of the road just leads into wilderness. We're also treated to foxes, ducks, moorhens, bats, herons, various birds, hedgehogs, and apparently there's badgers too :)
A year or so ago, the owner of the fields nearby wanted to build a few hundred houses on them...luckily the planning application was turned down, else we certainly wouldn't see such lovely wildlife anymore!

Valentines Heart Vase


I’ve had these hearts in my stash since I bought them from Poundland last year! At the time I thought, ‘Great! Something for Valentines crafting!’

…then I couldn’t think of what to do with them.

This year, I came up with this:


I probably spent about ten to fifteen minutes putting this together. Here’s a little how-to!


You’ll need:
A vase
Hearts on a stick (or skewer some loose polystyrene hearts!)
Moss*
Oasis or polystyrene
Ribbon (not pictured since it was an afterthought!)
Scrap paper or newspaper to work on
Scissors
PVA Glue (optional)
 
*I used moss from the garden for this, which isn’t ideal really! Since I don’t have any of that lovely soft moss for crafting with (and any place I might get it is unreachable without someone to drive me) I just went outside and picked some up! I let it dry overnight on the boiler.
…crafting moss, or whatever it’s actually called, is definitely the best option though :)

Enough of my rambling, here’s that tutorial!


1.  Cut a piece of oasis to fit the bottom of the vase, with space around it.


2. Trim the sticks of the hearts down to size. I used scissors for this since the dowel was only thin. Push them into the oasis as you want.


3. Arrange moss on the top of the oasis, around the sticks.


4. Set the piece carefully into the vase and add more moss around the edges. I know, this doesn’t look pretty, does it?! Moss from the garden really doesn’t work well (it didn’t help that a lot of it went brown lol)

Alternative to steps 3-4: Glue moss on the top and sides of the oasis before setting it in the vase.


5. Wrap ribbon around the base of the vase and tie in a bow. For me, this hid the nasty sides of the arranged piece inside the vase, but it’s also a nice finishing touch! 


I’ve still got a couple of these hearts left...knowing what I’m like, they’ll lurk in my stash until next year!


Check back soon for another Valentines-related craft :)


Will be linking up at the parties at the bottom of the page!

Tuesday 7 February 2012

Call for Prayers

When saying your prayers,
please remember my mum's friend Chris, who is seriously ill.

I would really appreciate it, as would my mum, and of course Chris's loved ones.
Chris is of course under care of doctors but a little help from the powers that be never goes amiss :)

Thanking you in advance ♥

Monday 6 February 2012

Typography Challenge? Hooray!


So the Naughty Notions Challenge may have entered the voting stage (remember you can vote daily until the end of the month!). But Rikka and Keren have already come up with something new for us to take part in!

Bring on....the Typography Challenge!

Click on the banner above to go and check out the full details!
This time around the challenge is all about home decor!
 I'm looking forward to this; I don't often make home decor items so it will be a challenge indeed! But I've already got ideas and hope to some up with something fun and funky for my entry!

Home some of you will be joining in too! Keren and Rikka's challenges are always lots of fun :)

Sunday 5 February 2012

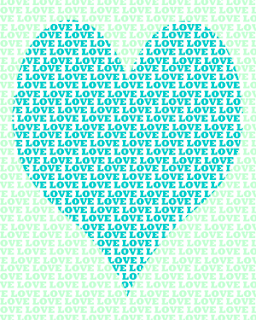
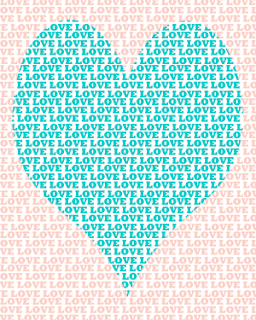
Printable: Love Heart

Printables are always a fun thing to sit down and make; since V-day is approaching I thought I'd try to come up with more than just the Valentine's Day coupons printable that I posted the other day.

Inspired by a painting I did many years ago, I created this 'Love Heart' printable in several colourways.

To Download: Click the image to be redirected to a page where you can view, print and download a PDF.
Size: 8"x10"

red and pink love heart printable


blue and green love heart printable


blue and pink love heart printable


Will be linking up here!/the parties at the bottom of the page!

Saturday 4 February 2012

Naughty Notions Challenge: Go Vote!


Voting for the Naughty Notions Challenge is now open, over at Richochet and Away!
I posted about my entry the other day, but here's a quick reminder of my 'Naughty Notions' clutch:

Pin It
Read about my clutch here
 
See everyone's fantastic entries and cast your vote for your favourite at Ricochet and Away!
And whilst you're there, check out Rikka's other posts, and pop on over to Keren's blog, Sew la vie, too. Give the contest hosts some love!
Related Posts Plugin for WordPress, Blogger...